Quick guide: eSignR Software installation
Here you will learn how to install the eSignR software correctly and soon achieve digital legally binding signatures.

From point 2 – Create account
(incl. further instructions for signature profiles)
1. Create the prerequisites – get identified
In order to be able to sign electronically in a qualified manner, you must identify yourself. Through our partner Swisscom Trust Services You can choose between various SRS identification methods, whereby we particularly recommend the free on-site identification in a Swisscom shop. You can find more information on this in our identification guide.
Familiarize yourself with the Swisscom Mobile ID beforehand. The Mobile ID is an indispensable component for the use of eSignR and for the security of your qualified signature. Install and activate the Mobile ID with the Mobile ID App (not the Mobile ID SIM!) before you visit the Swisscom store and make sure to note down the MobileID recovery code!
For more information, visit Swisscom’s website at: mobileid.ch and https://srsident.trustservices.swisscom.com/srs-direct/.
2. Create an account
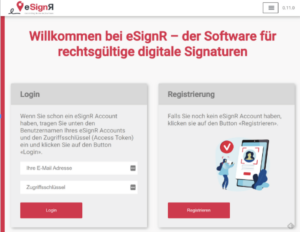
To use eSignR, you must first create an account in the eSignR web application and have your email address verified. https://app.esignr.ch/webapp/

Email verification
You will then receive a verification email, open it and click on the link. Once you have completed the verification, you can log in to the eSignR online portal.
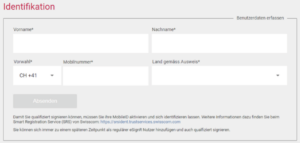
3. Complete identification
In order to be able to sign with the eSignR software (client) in a qualified manner, you must check in the eSignR online portal whether you have identified yourself to Swisscom. To do this, you must enter your first name, last name, mobile number and nationality in the online portal exactly as you did when you identified yourself in the Swisscom store (according to the ID card presented).


Now your account is fully created and your free trial subscription will automatically run for 30 days from this point.
For more information about identification, please visit:
srsident.trustservices.swisscom.com
esignr.ch/en/digital-signature/#identification
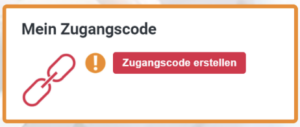
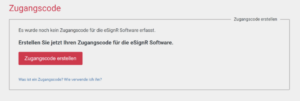
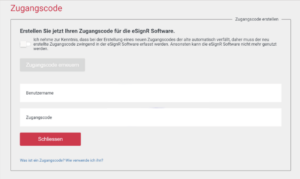
4. Create an access code
To log in to the eSignR software, you need an access code (access key for the eSignR software), which can be generated in the online portal.
The access code is only made visible when it is generated. If you forget the access code, you can create a new access code. This will then automatically cause the old access code to expire.
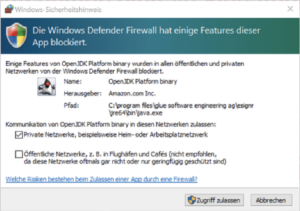
5. Download, install & start software
Download the eSignR software now. Note Mac: Depending on your personal settings, you may need to share eSignR first via System Preferences under Security & Privacy (bottom left open lock with admin password and then share eSignR).
-> Click here to go to the download area
When starting the eSignR software on Windows 10 for the first time, a warning dialog from the local firewall may come up. Click on “Allow access”. Afterwards, the eSignR software will automatically load in your default browser. Use the email address you registered with for eSignR and the access code you generated in the online portal to log in.
Done! Now you can use eSignR and sign for free for 30 days.
Note: If you close the browser window where eSignR is running, eSignR will exit itself after about 30 seconds. However, you can also exit eSignR directly using the “Exit eSignR” option from the menu.
